
[av_heading tag=’h2′ padding=’10’ heading=’Media/Movement History Timeline How-To Table of Contents‘ color=” style=’blockquote modern-quote modern-centered’ custom_font=” size=” subheading_active=” subheading_size=’15’ custom_class=”][/av_heading]
[av_toggle_container initial=’0′ mode=’accordion’ sort=”]
[av_toggle title=’Create Your Timeline’ tags=”]
Create Your Timeline
- Go to: https://yourcelf.github.io/TimelineJS-editor/

- Type a name for your timeline
- Enter a link to an existing timeline spreadsheet that you want to copy or leave blank to use the default
- Click Create New Timeline

Sharing your timeline
Copy and share the https://goo.gl address to share this screen where you and other people can edit your timeline.
[/av_toggle]
[av_toggle title=’Edit and Add 1 story’ tags=”]
 Add 1 story by clicking Add My Story
Edit the current story by clicking Edit This
Edit the story here and click Save.
[/av_toggle]
[av_toggle title=’Edit and Delete All Stories’ tags=”]
- Choose More/Edit All Rows
- All of the stories will appear in the left. From here you can edit and delete any story.

[/av_toggle]
[av_toggle title=’Share your timeline’ tags=”]
Click Share Result
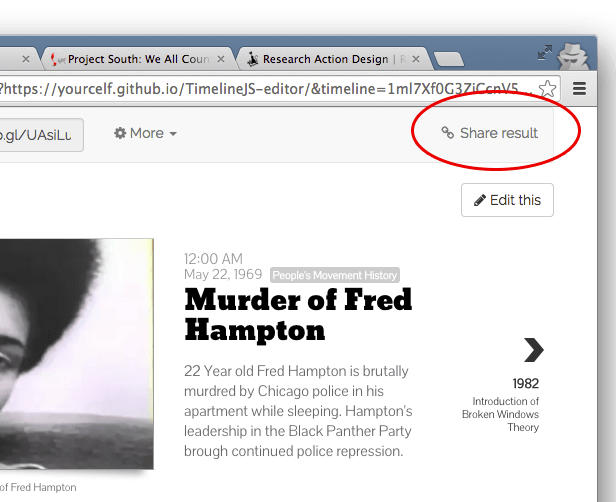
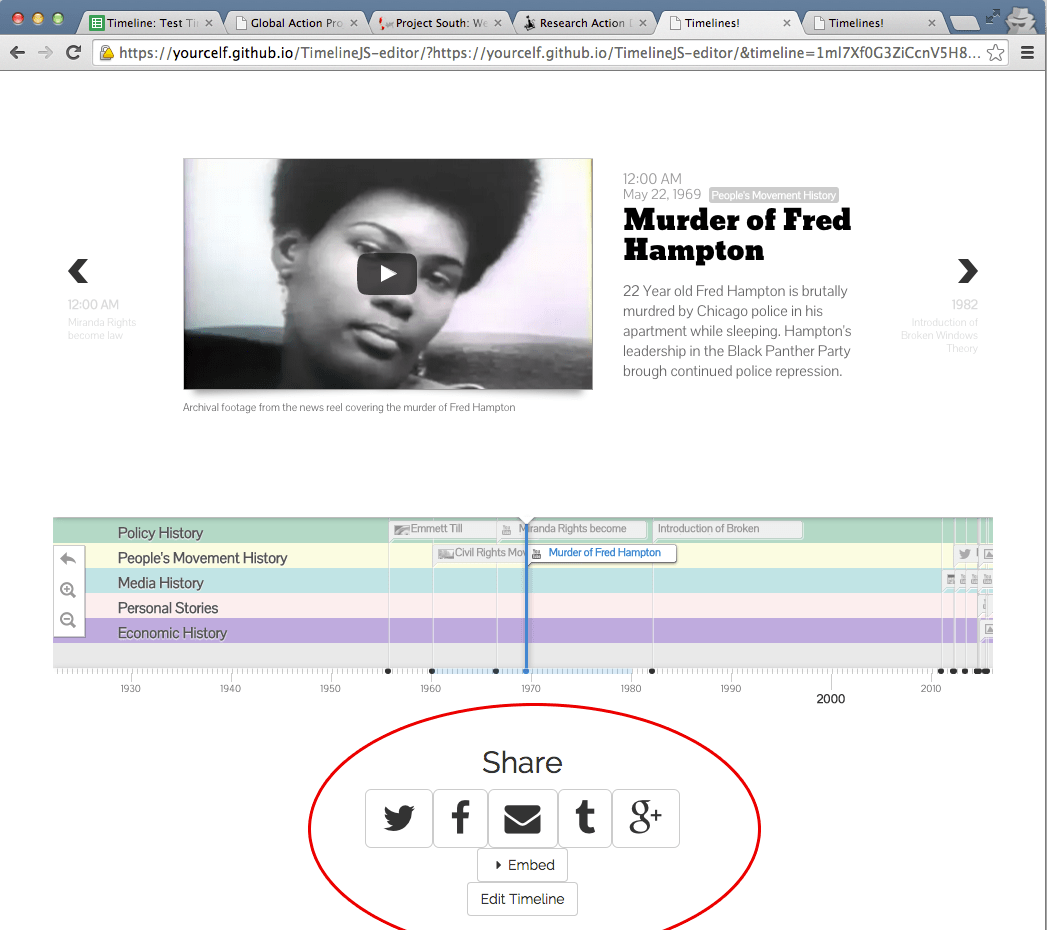
It will bring you to this display page where you will see a screen with web sharing buttons. Click the icon you want to share by.
[/av_toggle]
[av_toggle title=’Lost your Timeline?’ tags=”]
Can’t find your timeline? Lost your the short “http://goo.gl” link to edit your timeline? You’ll need to find your spreadsheet in your google drive.
- Go to Google Drive
- Do a search for a file called “Timeline: name of your timeline”
- Open it and copy the end of the URL
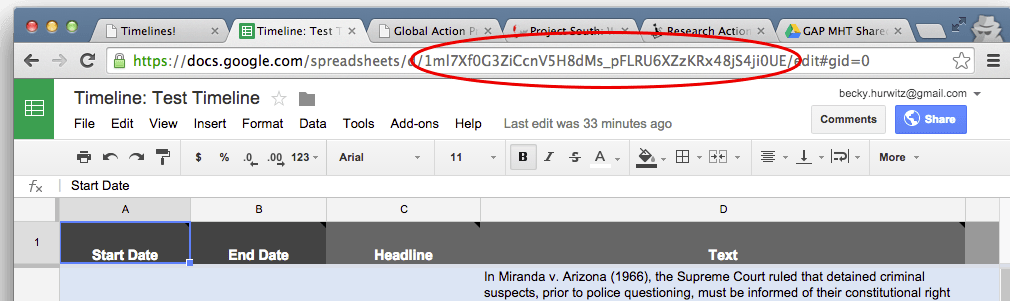
- Open a new browser tab and paste this into the url: https://yourcelf.github.io/TimelineJS-editor/?https://yourcelf.github.io/TimelineJS-editor/&timeline=
- ADD the set of letters and numbers you copied from your Google Sheet and you will see a view window for your timeline, EXAMPLE: https://yourcelf.github.io/TimelineJS-editor/?https://yourcelf.github.io/TimelineJS-editor/&timeline=1ml7Xf0G3ZiCcnV5H8dMs_pFLRU6XZzKRx48jS4ji0UE
[/av_toggle]
[av_toggle title=’Working with the Timeline Spreadsheet and other Advanced Functionality’ tags=”]
When you create a Timeline and press Create a New Timeline, you are creating a Google Spreadsheet. Every story you add is in this spreadsheet. For now, you need a Gmail login to do this.
Open the spreadsheet
If you are familiar with spreadsheets and wish to edit the timeline via the sheet or are curious about what is in this spreadsheet, you can view it by clicking: MORE/View spreadsheet
Batch Actions (like Deleting all stories)
You can batch edit easily in the spreadsheet view. To DELETE ALL STORIES and create a blank timeline, delete all rows below Row 1, leaving the categories starting with “Start Date.” Click back to your Timeline Edit Screen, to see your blank timeline.
Custom Tags
You can rename the Timeline Rows by changing the words in the column called “Tag”. These will not appear on the edit page in the Tag list, but will appear in the timeline.
[/av_toggle]
[/av_toggle_container]
[av_textblock size=” font_color=” color=”]
Please Complete the Following Evaluation After Using the How-To and Timeline JS to Create A Timeline
Google User:
TimelineJSThrowaway
Password:
ThrowAwayTODAY
[/av_textblock]